Dashboard
Summary
This is the Android SDK of BucksTracks.
Basic Installation
These are the minimal steps required to integrate the BucksTracks SDK into your Android project. We are going to assume that you use Eclipse for your Android development.
1. Get the SDK
Download the latest version from our releases page. Extract the archive in a folder of your choice.
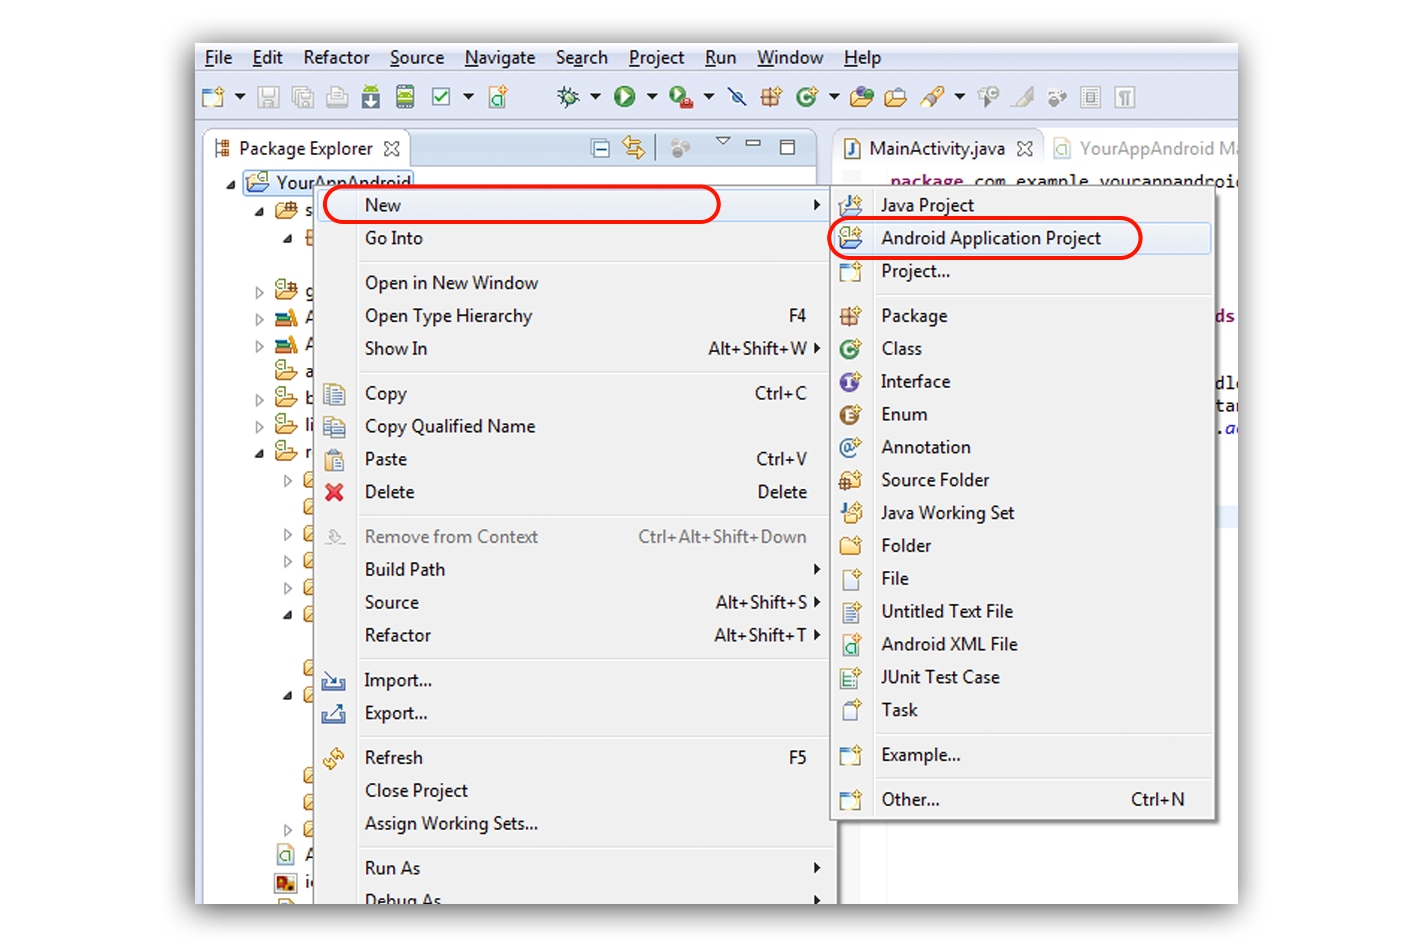
2. Create the BucksTracks project
In the Eclipse menu select File → New → Project...
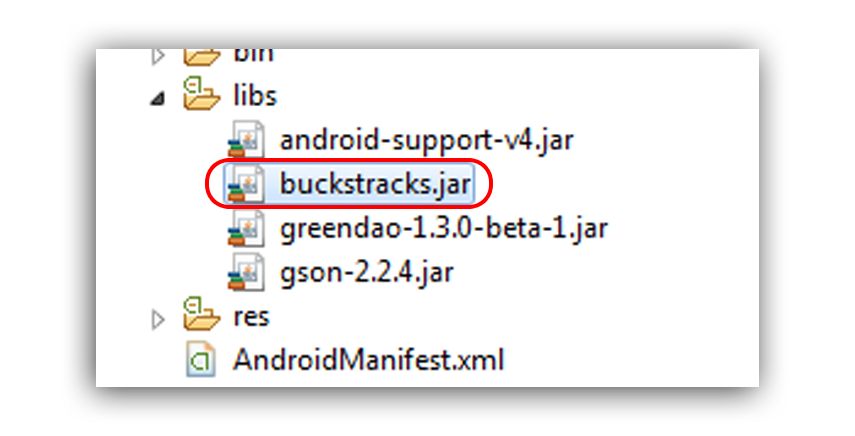
3. Add the BucksTracks library to your project
add the following jar libraries in libs folder of your project:
- buckstracks.jar
- gson-2.2.4.jar
- greendao-1.3.0-beta-1.jar
- android-support-v4.jar
and then add the google play services. In the left pane select Android. In the bottom right group Library click the Add... button. From the list select the your google play service library project and click OK. Save your changed project properties by clicking OKagain.


and click OK.
4. Configuration of parameters
In your strings.xml you add the following parameters :
<string name="tats_app_id">your tats app id</string>
<string name="gcm_sender">GCM_PROJECT_NUMBER</string>
<!-- Log Level -->
<string name="tats_log_verbose">verbose</string>
<string name="tats_log_debug">debug</string>
<string name="tats_log_info">info</string>
<string name="tats_log_warn">warning</string>
<string name="tats_log_error">error</string>
<string name="tats_log_assert">assert</string>
<!-- Enviroment -->
<string name="tats_env_production">production</string>
<string name="tats_env_sandbox">sandbox</string>
5. Add permissions
In the Package Explorer open the AndroidManifest.xml of your Android project.
Add the uses-permission tag for INTERNET if it's not present already.
<uses-permission android:name="android.permission.ACCESS_WIFI_STATE"/>
<uses-permission android:name="android.permission.INTERNET" />
<uses-permission android:name="android.permission.ACCESS_NETWORK_STATE" />
<uses-permission android:name="android.permission.READ_PHONE_STATE" />
<uses-permission android:name="android.permission.WRITE_SETTINGS" />
<uses-permission android:name="android.permission.ACCESS_FINE_LOCATION" />
<uses-permission android:name="android.permission.ACCESS_COARSE_LOCATION" />
<uses-permission android:name="android.permission.WAKE_LOCK" />
<permission
	android:name="com.example.yourapp.permission.C2D_MESSAGE"
	android:protectionLevel="signature" />
<uses-permission android:name="com.example.yourapp.permission.C2D_MESSAGE" />
<uses-permission android:name="com.google.android.c2dm.permission.RECEIVE" />
6. Create Broadcast Receiver and Service
To use the tats capabilities it is necessary to create two component a BroadcastReceiver and a Service. In a package of app create
6.1 Service
In a package of your app (suppose com.example.yourapp.buckstracks ) add a class wich extends com.tatssense.core.gcm.GcmIntentService:
package com.example.yourapp.buckstracks;
import com.tatssense.core.gcm.GcmIntentService;
public class YourIntentService extends GcmIntentService{
	@Override
	protected void deleteMessageFromServer(String arg0) {
            }
	@Override
	protected void recivedErrorMsgFromServer(String arg0) {
		// Error message if somethings goes wrong
	}
	@Override
	protected void recivedMessageFromServer(String arg0) {
		// Text of your notification
	}
}
6.2 Broadcast Receiver
In a package of your app (suppose com.example.yourapp.buckstracks ) add a class wich extends com.tatssense.core.gcm.GcmBroadcastReceiver:
package com.example.yourapp.buckstracks;
import com.tatssense.core.gcm.GcmBroadcastReceiver;
public class YourBroadcastReceiver extends GcmBroadcastReceiver {

	@Override
	protected void eventPushIdArrived(String arg0, Context arg1) {
		//arg0 is the push id
	}

	@Override
	protected String getServiceIntentName() {
		return YourIntentService.class.getName();
	}

}
7. Declaring Receiver and Service in AndroidManifest.xml
<receiver
	android:name="com.example.yourapp.buckstracks.YourBroadcastReceiver"
    android:exported="true" >
        <intent-filter>
            <action android:name="com.google.android.c2dm.intent.RECEIVE" />
            <category android:name="<YOUR_APP_PACKAGE_NAME>" />
        </intent-filter>
</receiver>
and then add your service:
<service android:name="com.example.yourapp.buckstracks.YourIntentService" />
8. Declaring parameters in AndroidManifest.xml
The following parameter is related to the google play services
<meta-data
    android:name="com.google.android.gms.version"
    android:value="@integer/google_play_services_version" />
The TatsAppId parameter is the identifier of the Buckstracks system
<meta-data
    android:name="TatsAppId"
    android:value="@string/tats_app_id" />
The GcmSender is gcm project number of google
<meta-data
    android:name="GcmSender"
    android:value="@string/gcm_sender" />
The TatsEnvironment is the the type of enviroment where you execute the app
<meta-data
    android:name="TatsEnvironment"
    android:value="@string/tats_env_production" />
Depending on whether or not you build your app for testing or for production you must adjust the Environment setting:
- sandbox - for testing
- production - before publishing
- The TatsLogLevel defines the app’s log leves
<meta-data
    android:name="TatsLogLevel"
    android:value="@string/tats_log_verbose" />
You can increase or decrease the amount of logs you see by changing the value of AdjustLogLevel to one of the following:
verbose- enable all loggingdebug- enable more logginginfo- the defaultwarn- disable info loggingerror- disable warnings as wellassert- disable errors as well
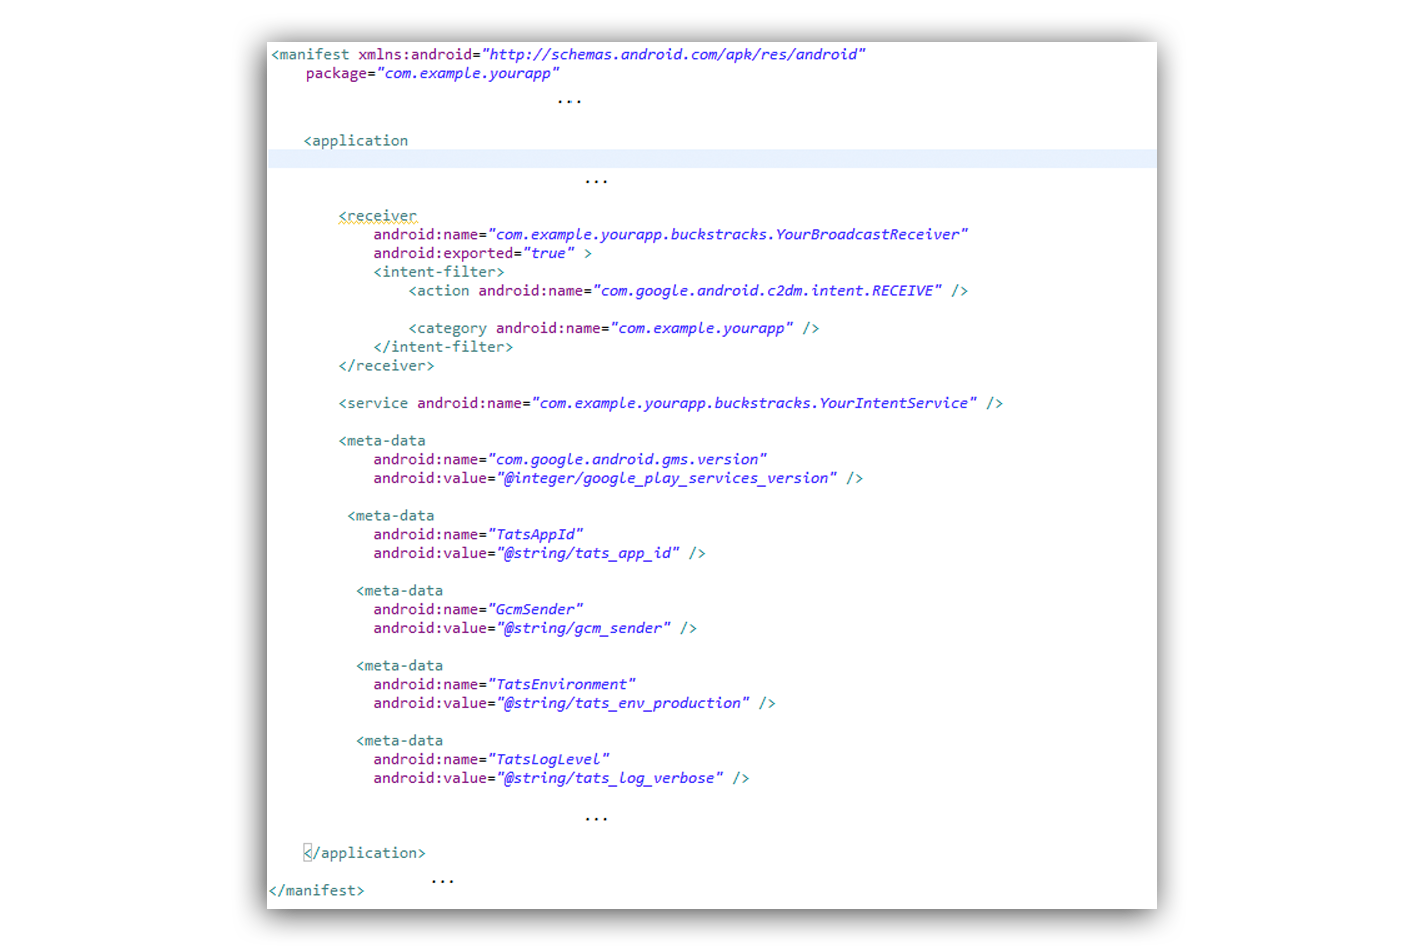
Following an example of the android manifest
9. Integrate Buckstracks into your app
To track the user’s actions you could call the following method from the activity of your app:
Buckstracks.trackInst(this);Buckstracks.trackOpen(this);Buckstracks.trackClose(this);...
For a complete knowing of the api, please consult the API Docs.
10. How to use Custom track action
To use the custom event tracking add the following line of code:
Buckstracks.trackCustomEvent("id_custom_event", "value_custom_event", getApplicationContext());
Alternatively to context of the app it is possible to use the istance of the activity which host the method:
Buckstracks.trackCustomEvent("id_custom_event", "value_custom_event", this);
Following the meaning of the used parameters:
- id_custom_event - id of action custom to track
- value_custom_event - action custom to track
11. How to use Purchase track action
To track the purchase event add, where you need, the following lines of code:
Buckstracks.trackPurchase("currency_code", "price", getApplicationContext());
Alternatively to context of the app it is possible to use the istance of the activity which host the method:
Buckstracks.trackPurchase("currency_code", "price", this);
Following the meaning of the used parameters:
- currencyCode - type of currency you are using es. "EUR"
- price - item's price you are buying
12. How to track Referrer parameter
To add install referrer feature you should add the following in the main App Manifest xml
<receiver
	android:name="com.tatssense.core.AcoTracker"
    android:exported="true" >
        <intent-filter>
            <action android:name="com.android.vending.INSTALL_REFERRER" />
        </intent-filter>
</receiver>